Scalper Common Settings Explained

This post explains all common settings for my series of Abiroid Scalper Indicators which will calculate the SL/TP and show Win Rate Percentages.
These indicators are not just scalpers, but are also for longer term trading on higher timeframes:
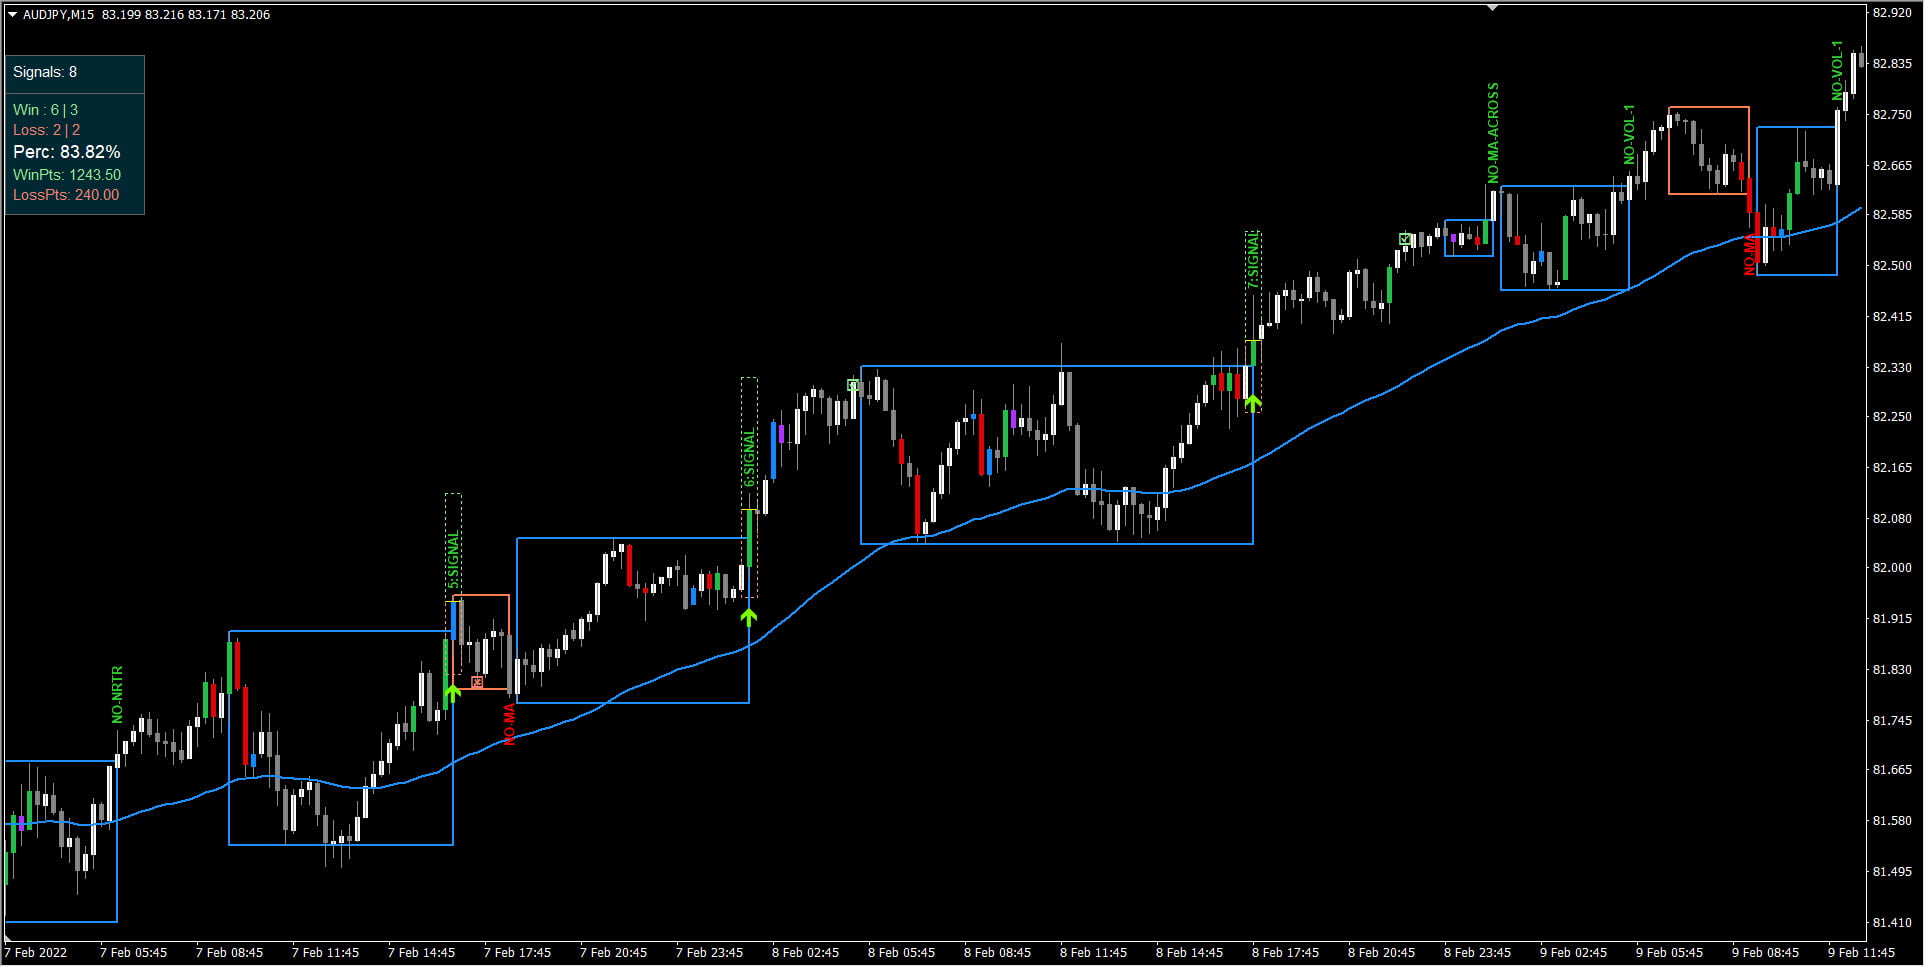
The Arrow Indicator will just show the Win/Loss values count and points for the current pair/timeframe:
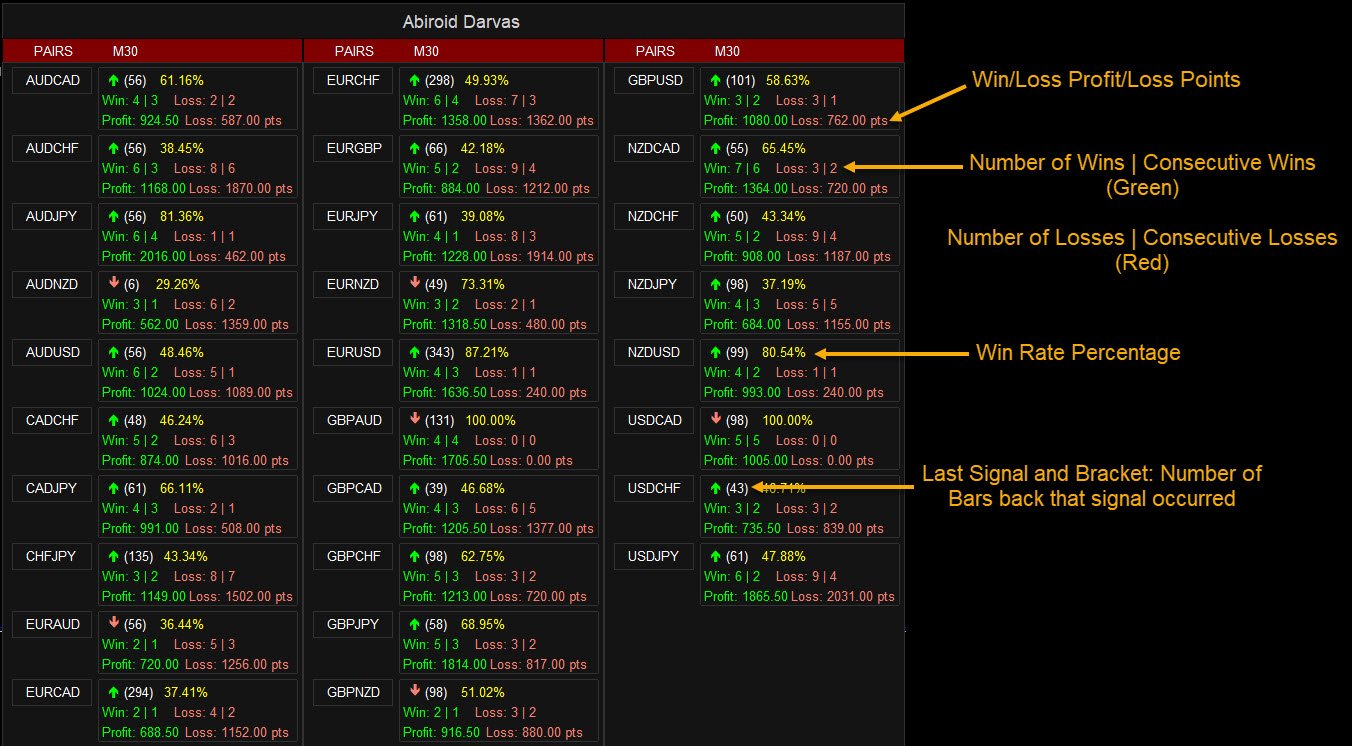
And scanner is for all pairs/timeframes that you define.
“NA” means there are no signals in the past “Max Past Bars”. So percentage can’t be calculated yet.
Settings:
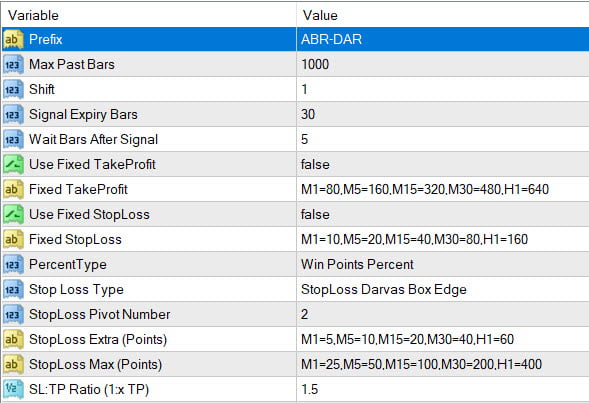
Prefix: Make sure it’s unique because arrows and scanner indicators use this Prefix to draw elements on the chart. And on indicator unload, it will delete all objects with unique prefix.
Max Past Bars: Total Bars for Win Rate and other calculations
Shift: Starting bar. Most indicators will have this as Minimum 1. Because indicators draw arrows on candle close.
Signal Expiry Bars: Close trade calculations after these number of expiry bars. Useful for binary options. Or if SL/TP not defined, it will check price at the “expiry bars” number of bars. To check for profit
Wait Bars After Signal: After an arrow signal, wait at least this number of bars before a new signal. This is to make sure that multiple signals are not generated nearby.
Win/Loss Calculations:
- Set Fixed SL and TP Distances (Optional)
By default if Fixed SL/TP is true, then give precedence and use these values. Suppose Fixed TakeProfit is false, then only use Variable TP. Same for Stop Loss. If Fixed SL is false, then check for variable Stop Loss. If variable Stop Loss is also None, then use the Signal expiry bars to check for price at that bar. And get Win Rate that way.
- Or Variable StopLoss (different for each Type of strategy)
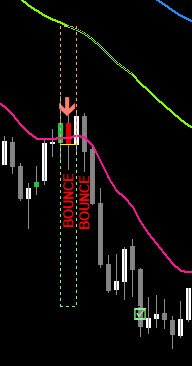
E.g. EMA Bounce has possibility of having variable Stop Loss at MA.
Darvas Boxes have possibility of having variable Stop Loss at Box edge. Or at Pivot Points. Or at MA.
Percent Type: Win Points or Win Count.
If Win rate is using Win Count, then percent is (No. of Wins)/total
Or if Win rate is using Win Points, then percent is (Total Points added for all Wins)/(Total Points)
Win Points are when price closed above/below entry for BUY/SELL respectively.
StopLoss Extra Points: Add extra points to Stop Loss.
This feature is not there in all indicators. Only ones which use probable Pivot or other SR areas for Stop Loss. Because it’s better to place StopLoss slightly away from SR areas.
StopLoss Max (Points): If StopLoss is more than Max points, then change StopLoss to this Max value
TP Ratio (1:x SL): If TP is not fixed, and there is no variable TP methods, then take this value to calculate TP from the SL value.
E.g. For Darvas Boxes, it is best to have SL at Box edge or at a possible pivot point. And TP can be calculated from SL. Using this multiplier.
SL Ratio (1:x TP): If SL is not fixed, and there is no variable SL methods, then take this value to calculate SL from the TP value.
These SL/TP value calculations depend on strategy. And won’t be available in all strategies.
Note:
The prices and point calculations don’t use the Ask/Bid or Spread values. They only use the closing price and high/low prices.
This is because MT4 only provides the current Ask/Bid price. So for previous bars, it will be very difficult to know the actual spread.
So, please use the Point Calculations for Reference only. And if scalping, only trade pairs with a very low spread.
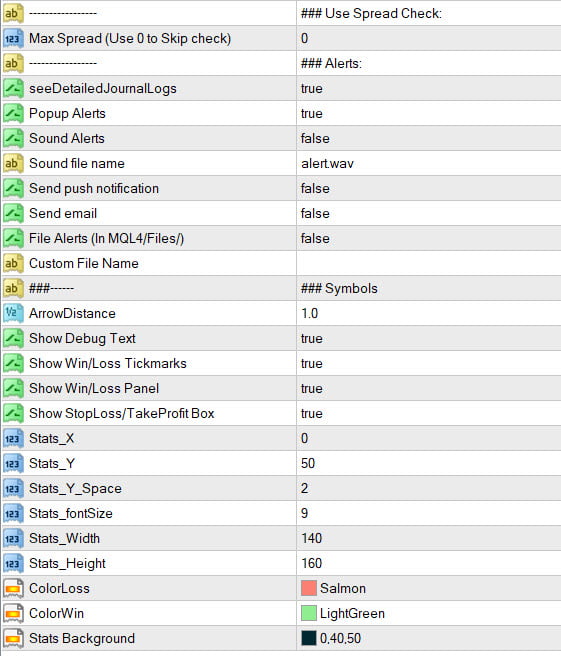
Max Spread: Default 0 value means no check. If a value is specified, it will use pairs with less than this Max Spread value.
Other Features:
- Panel positioning and colors
- Debug Text to skipped signal reason
- Adjust Arrows
- Refresh Every given number of Ticks
- Options to show/hide Debug, Win/Loss Checkmark or Cross, Win/Loss Panel, SL/TP Boxes:
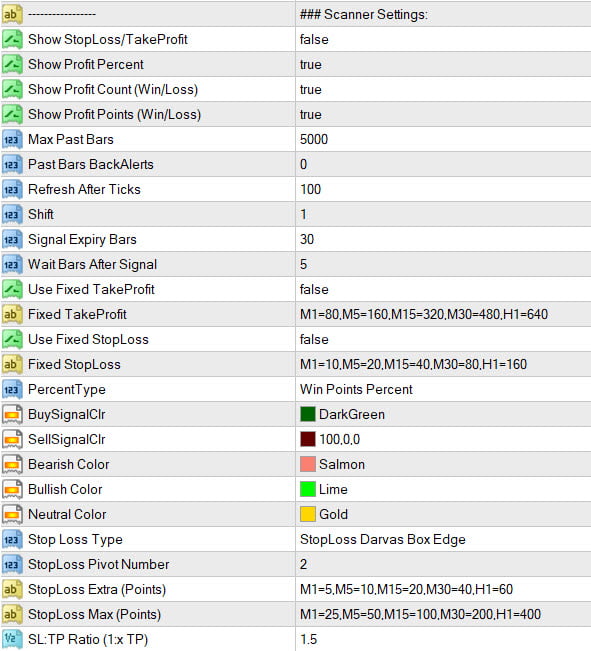
Common Scanner Settings:
https://abiroid.com/indicators/abiroid-scanner-dashboard-common-settings
Strategy specific scanner settings will be exactly same as Arrows Indicator. So their set files are interchangeable.
Other scanner Settings are for customizing Buy/Sell or Neutral Colors. And to Show/Hide the SL/TP, Win/Loss counts and Consecutive Win/Loss and Profit/Loss Points.
For example in binary options we are not interested in profit points. We are only interested in Win/Loss Count number.
Using Arrows and Scanner together:
Make sure that your purchased arrows ex4 and the free scanner ex4 are both in same folder.
Scanner uses arrows ex4 internally.
Using demo arrows with scanner:
Just rename the demo Arrows and remove word “Demo”:
e.g. “Abiroid EMA Bounce Arrow Demo.ex4” rename to “Abiroid EMA Bounce Arrow.ex4” and place it in the same folder as it’s scanner.
You can then select Own Pair List in scanner. And select EURUSD,AUDUSD,USDJPY
to see all 3 pairs in the scanner. Arrows demo only supports limited pairs.
Look in product description to see which limitations arrows demo has.